Install an RV Door Catch in Minutes!
We’ve made significant improvements since we bought our RV. The lack of a door catch has been driving me nuts since we started RV living. Honestly, I don't know why manufacturers don't install this stuff.
Maybe the newer RV models have door catches, but ours didn’t. The RV doors always whacked me in the head. So, I decided to install door catches in our RV. Today, I’ll show you how to do the same for your RV. It’s super simple, and you can do it in minutes. You’ll only need a few items:
A cordless drill or screwdriver
A square drill bit if you use the cordless drill.
A tape measure
An Adamantium door catch
Robertson's square-headed screws
Installation steps:
Like every one of my DIY projects, I never know how it’ll turn out until I start. I pretty much wing it and hope for the best. By the time I bring these projects to you, I’ve already fixed any kinks they may have. Essentially, I make all the mistakes so that you don’t have to.
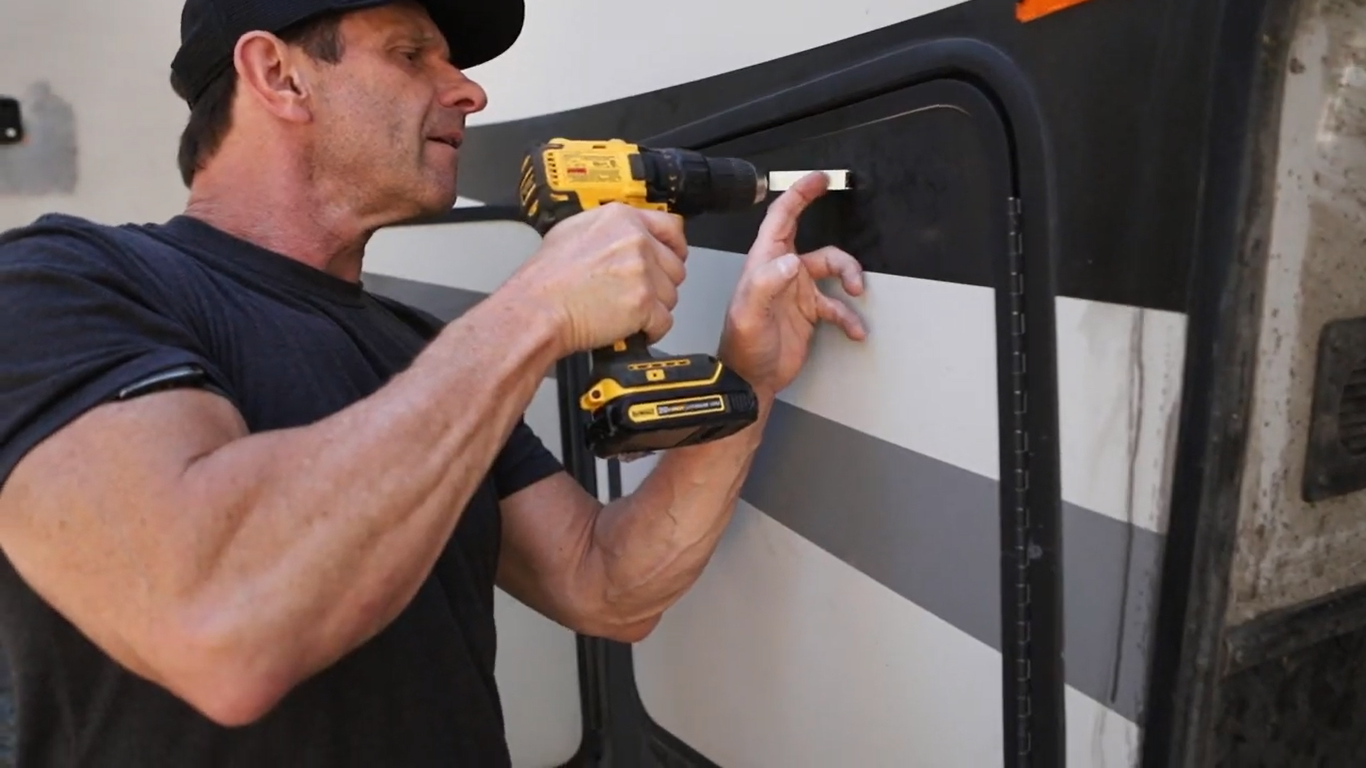
There's no exact place to put the door catch, so I decided to put ours two inches from the top of the door.
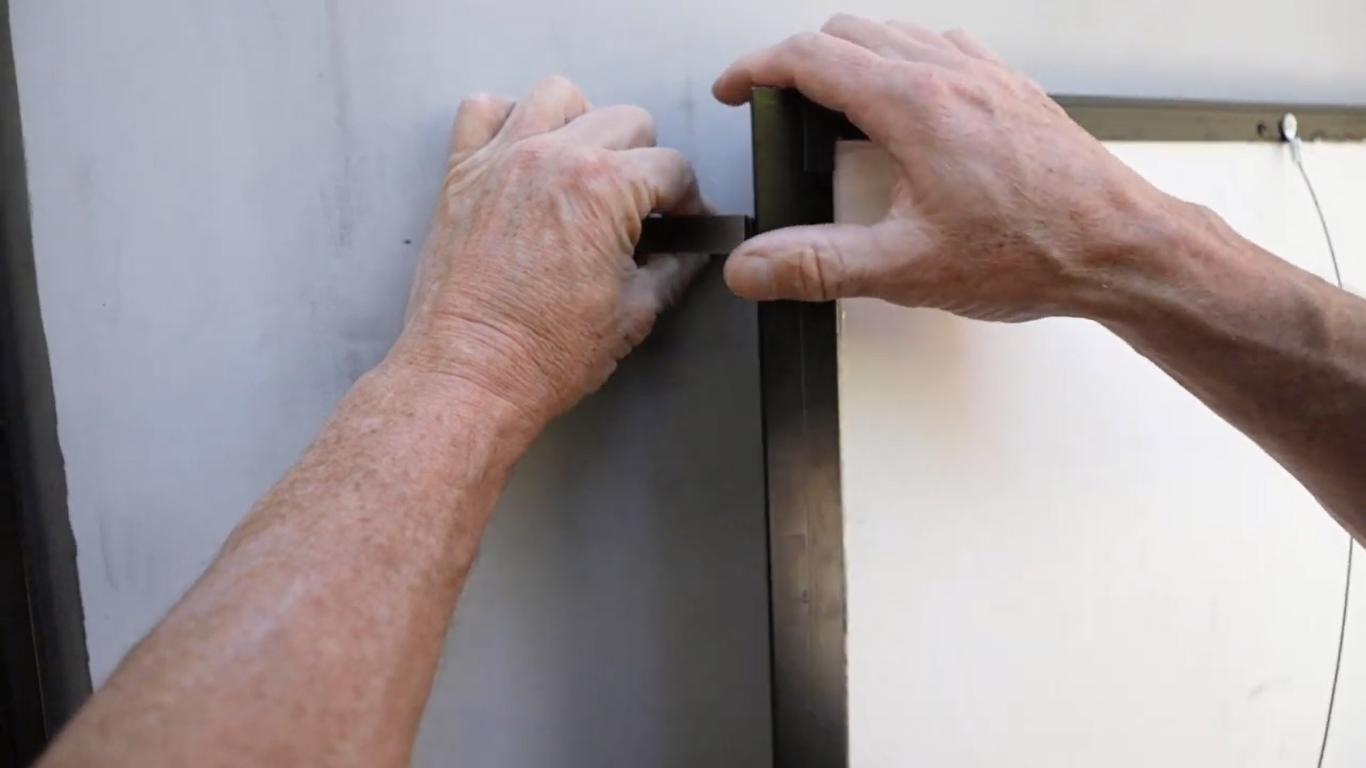
Slide in the door catch behind the door until it looks like it’s going to catch it.
Once you’ve found a position that allows your catch to hold the door open, drill it in. You want to make sure that there’s no plumbing or electrical behind there. You could get shocked or have water gushing out.
Repeat these steps with all your RV doors. The catches will make your life so much easier. You won’t need someone to hold the doors for you when your hands are full.
Bonus tip: Leila found magnetic hooks you could use to dry towels and other things outside your RV. You can also use them to hang your tools when you’re in the middle of a DIY project.
As always, we look forward to sharing more of our adventures with you.
Watch our video below to install the RV baggage door catch with us: