RV Design Ideas: Renovating an RV Into a Tiny House
Living in an RV full time doesn’t mean living without the things you love. It should feel luxurious. It should feel like home, not like you’re living on the road. The interior of our fifth wheel embodies that sentiment. We decided to buy a vandalized RV and renovate it for this reason. We wanted to make our tiny home feel warm and cozy.
Leila, the interior designer extraordinaire behind our RV renovation, made sure our tiny home represented luxury with a side of whimsy. We only kept a few things from the RV, like the basic black trimming around the windows, which inspired our black and white color scheme.
Breaking down the walls and ceiling
When we bought the RV, the walls had huge holes that we needed to repair. They were a hideous color, so we painted them white to brighten the kitchen and living area. In the bedroom, we added white shiplap walls instead of painting.


We used Luxury Vinyl Plank (LVP) for the office wall. RVs tend to have funky moldings around the slide areas. We replaced those with LVP, so our RV looks more modern.
The ceiling also had huge holes. Instead of patching it up, we swapped the broken ceiling for a shiplap ceiling. It was a bit of work, but it turned out well.
Flooring

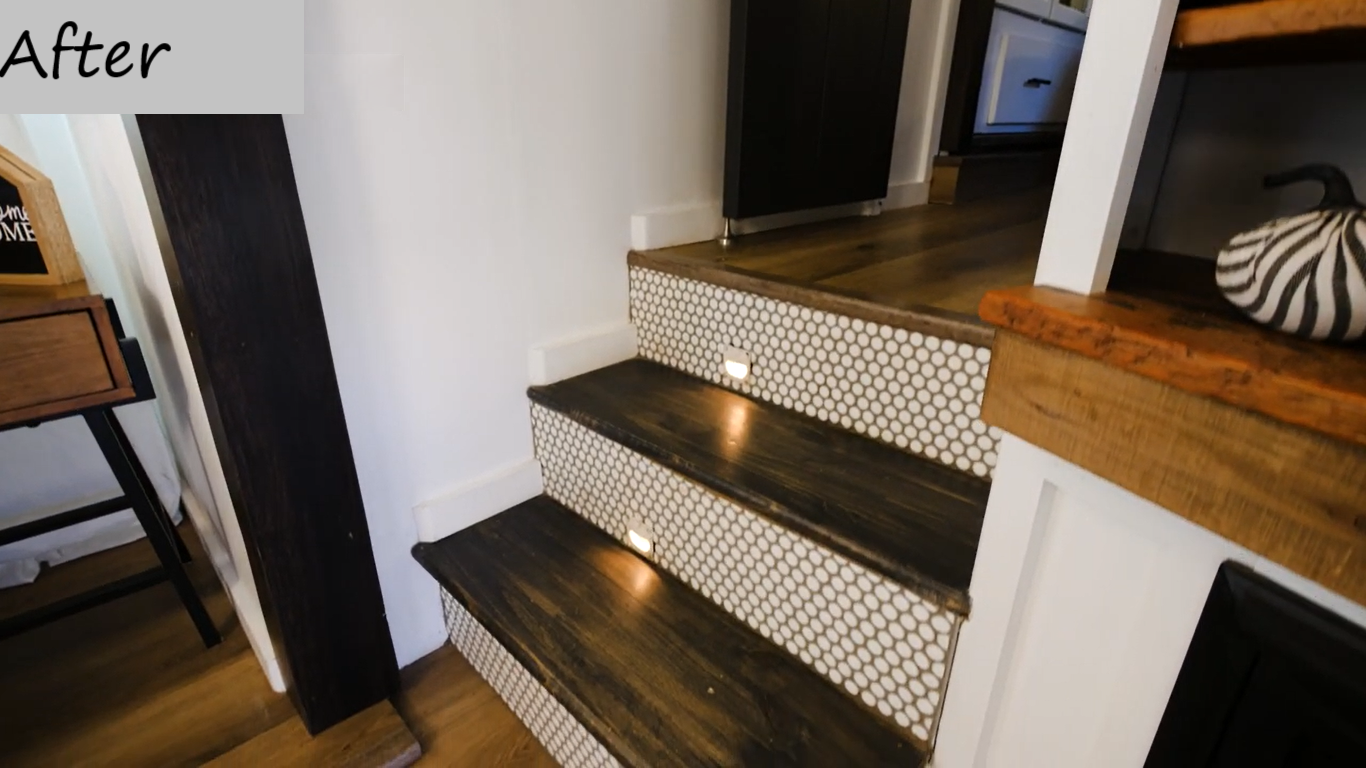
The RV had linoleum flooring and carpet when we found it. We pulled all that out and laid LVP just as you would on any other floor in your home. We replaced the carpet on the steps with custom treads and used a penny tile for the stair riser.
The best RV lighting
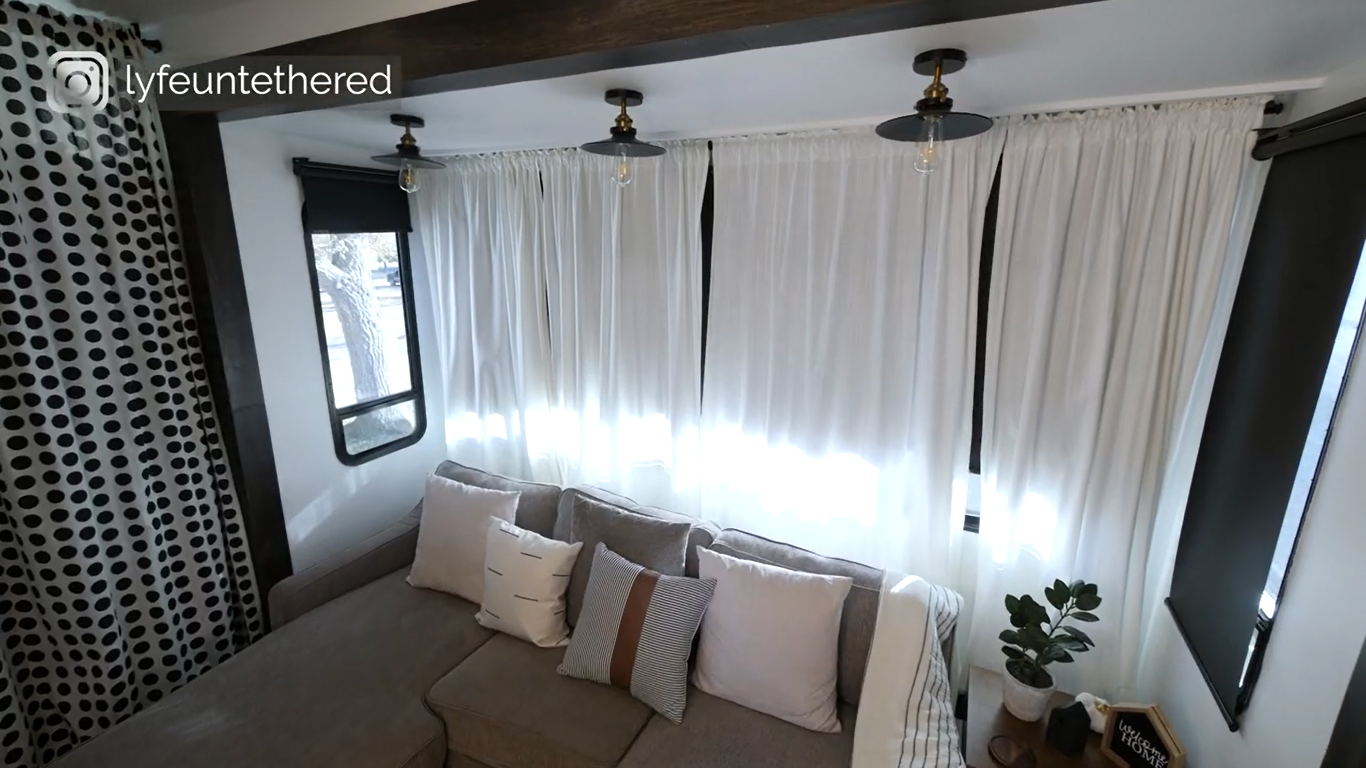
The RV came with puck lights that looked all kinds of horrible. So, we found Edison lights that work better with the space. They’re 12-volt light bulbs, and they bring a great atmosphere to our living room. We also added white lights that give a great ambiance to the rooms.
Revamping the cabinets
The RV had lots of large broken cabinets. We ripped most of them off and created more functional spaces.
We painted the kitchen cabinets white. To keep the color scheme, we painted the cabinet door handles black. We removed some cabinet doors for a better aesthetic, but the cabinets still have a lip, so things won’t slide. We installed additional shelving to give us more storage space. We also painted the bathroom cabinets and door.
Hooking up the electrical connections
We didn’t want to be confined in RV parks. We wanted to be self-sufficient and get off the grid if we wanted to. So, we added five 315-watts solar panels, Lithium-Ion batteries, and a 3500-watt inverter so we could run almost everything off the grid. We also spent nearly $5000 on a new Cummins Onan 5500 generator. Adding solar panels ensures that we can keep our fridge running 24/7.
It was crucial for us to have a reliable internet connection for our business, so we sprung for a Peplink Pepwave MAX Transit Duo modem. And with the unlimited AT&T plan, we have internet everywhere we go.
Livingroom décor
We didn’t treat the space like it was an RV. We decorated it using real furniture, curtains, pillows, and comforting things. It takes us a few minutes to put things away before a drive, but it’s worth it.
Leila LOVES a good fireplace; She considers it the central point of a home. So, we got an electric fireplace and built a custom mantle above it. It’s quite handy during the winter months.
We’re never short on entertainment either. The RV has a full-size TV mounted on a swing arm, Apple TV, and a Wi-Fi connection. We have an Amazon Alexa, so there’s access to music and streaming services.
Kitchen and bathroom décor


Replacing several things in the kitchen made a huge difference. We installed a penny tile backsplash and butcher’s block countertops. Butcher’s block is durable, so we don’t have to worry about it cracking when we’re traveling. We also added a modern faucet with a sprayer, which we love.
The first thing that matched our design style in the RV was the bathroom wallpaper. It made the space whimsical, and it had Leila’s favorite pattern – polka dots. We added hooks for our towels in the bathroom wall and a quartz countertop to replace the broken one we found. We use Turkish bath towels because they dry quickly and take up less space. We also added a penny tile backsplash.
The bedrooms
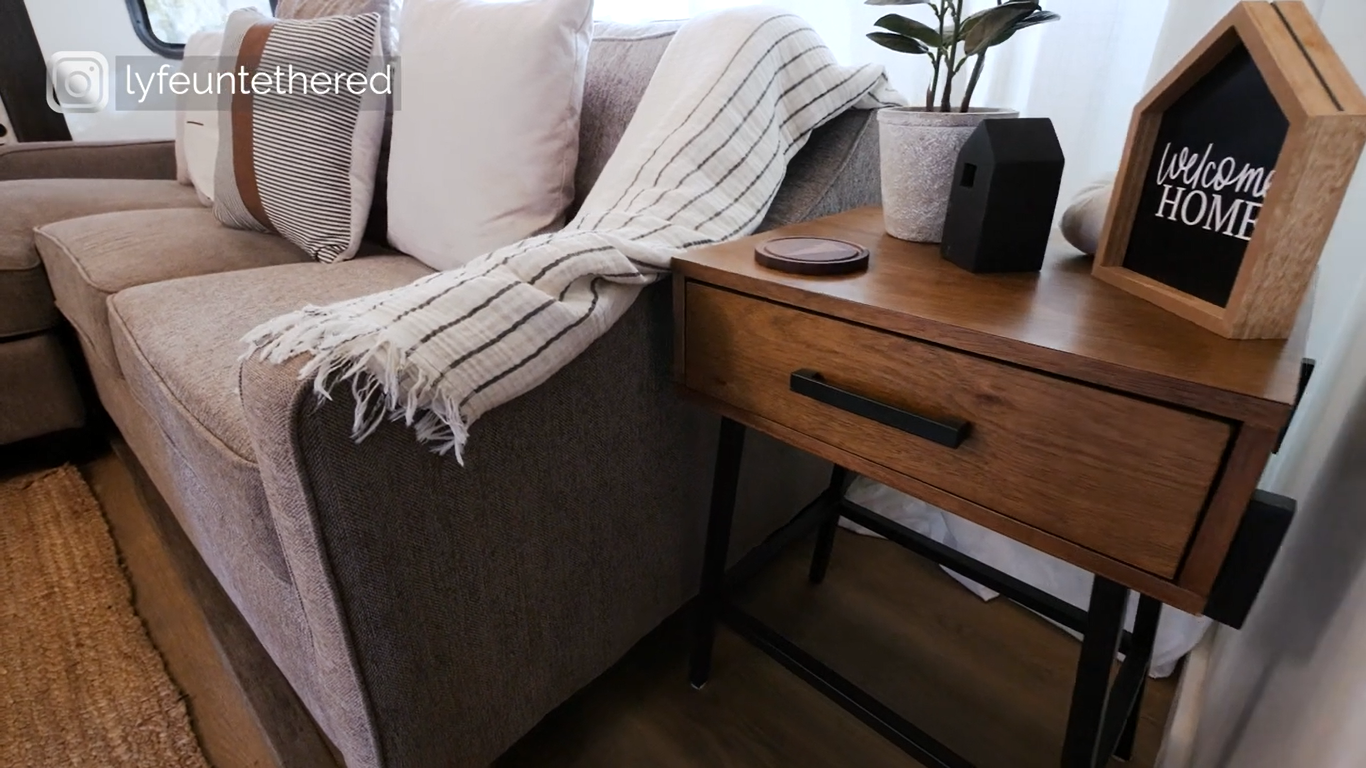
We spent time finding things to put into the bedroom space. Even our pillows are a nod to the penny tiles that tie into our aesthetic. We demolished the awful nightstands that made it feel crowded. Instead, we found unique furniture pieces that made the space feel custom and homey.

The wall sconces and my nightstand were built by Mason at Hines Pine Mill House.
We used LVP flooring, so it tied into the entire home. We even replaced our headboard and slide molding with LVP.
We made a small loft space for Kalin. We replaced the original weird short drapes with long ones, which Kalin loves. She can shut the drapes to have her own cozy haven.
The office
When we were looking for RVs, we wanted to find something that allowed us to have a dedicated workspace, and our fifth wheel provided just that. Our office has a desk, 3 monitors, and custom cabinetry from Barnwood.
The office also doubles as our laundry room. After spending a day at the laundromat, I had to install a Splendide washer-dryer set. They’re 110 volts, electric, and dry super fast.
I hope our RV remodel gives you some RV renovation ideas if you're considering jumping in. Hopefully, this helps to make your RV design process a lot easier.
And as always, we look forward to sharing more of our adventures with you.
Head over to our YouTube video to see more of the renovations!